Monday, 29 October 2012

Vines Alphabet Distructions

Vines Alphabet
Distructions

Draw an outline of your letter in pencil.

In pen draw the large vines into your shape.
 
Draw more vines behind.
 
 
At the top of the letter in the spaces between the vines add shapes that follow the contour of those spaces. Also add some small leaves coming up from the bottom of the letter in between the vines.
 
 
Add Fescu to either side of the small leaves.

Rub out the pencil lines and add shading to the larger vines to give them that rounded look and emphasis the overlapping.

Now you can add whatever doodle pattern you wish to your vines. I have used a variation of my pattern Hilly and also just a zig-zag with solid triangles in the other two vines.

If you would like to use whole alphabets in a project I have  complete outlines in my book "Creative Doodling with Judy A 2 Z". There are a number of Alphabets with their corresponding numbers form 0-9 as well as borders, words and frames to match. There a  many new doodle patterns included also to use in decorating these Alphabet Outlines.
 
If you would like to purchase my book click: HERE
 

HAPPY DOODLING

Friday, 26 October 2012

Celtic Challenge 11

Celtic Challenge 11

As Christmas is almost upon us, I decided to do a Celtic Christmas Tree. I used my Woodgrain pattern on the trunk, and part of my pattern Hilly in the knot section. The grass at the bottom is Fescu.


Your challenge this week is to decorate your Christmas Tree. You can use my outline below or design one of your own.

Below is the Distructions for my pattern Hilly. I only used the first 3 steps in the Celtic Christmas Tree I decorated above.

 HAPPY DOODLING

Tuesday, 23 October 2012

It's a Bugs Life Design and Patterns

It's a Bugs Life Design
 & 3 Pattern Distructions 

I picked up 3 beautiful stencils designed by Julie Fei-Fan Balzer at the craft and quilting show on the weekend. I have wanted some of her stencils since I first saw them on a youtube video but none of the craft shopes I visited had them.

I have used her leaf stencil to create a foliage scene with my airbrush and then doodled in the details.


Below are the distructions for a new pattern, a little bug and an edge design, I used for this scene.

LADY BUG


DEADWOOD


JAGGED EDGE


HAPPY DOODLING

Saturday, 20 October 2012

Cut Out Card

Cut Out Card


I went to the Craft and Quilt Fair in Brisbane yesterday. Had the best time I have had at a show for ages. They had so much that was of interest to me this time, and lots more stalls than the last show I went to there. 

I bought some Cut Out Cards to play with and doodled one last night. They had a lot of different designs on the stand at the show I could have gone broke if I had bought everything I liked. Here is what I did with this card.

I scanned the card on some Red cardstock so you could easily see the cut out section of the card. I scanned the card in the open position. 

As the diamond shapes had an embossed line to form a border around each one, I used a border pattern to define the cut out shape.


Here is a close up so you can see the detail in the doodle pattern.

 
I then added flowers in the two cutout sections. The flowers were actually being drawn on the inside of the card.

This is a picture of the front of the closed card.

 
 I then marked out in pencil where the cut out sections covered the inside of the card. I drew leaves and tendrils on the inside of the card so that it could not be seen when the card is closed.

Here is what you see when the card is open.

 
I won't add writing to the card until I decide what occasion I will use it for. If I decide to sell the card it will probably be Happy Birthday I will add. 

I would put the writing below the diamonds so that when you open the card the writing is still there.

In the centre diamond on the front I would put the persons name or their initial, using one of my Alphabet Designs

That leaves the space below the fold on the inside among the black leaves or the space above the fold on the inside to write your sentiments and name.


HAPPY DOODLING

Friday, 19 October 2012

Celtic Challenge 10

Celtic Challenge 10


These celtic designs present a different problem to most creative doodling activities, as the interwoven lines can be narrow and hard to decorate. I have decided that now and then I will also add some narrow continuous patterns to help you decorate your work. I have two new patterns today. 

Coral


 Teardrops


You do not have to use them with my Challenge, you can use whatever patterns you like. 

You can also take my patterns and change them to make them you own. Just decorating the pattern or colouring it differently from the way I have, will make all the difference.

This week I have used a design with very basic shapes and wide interwoven lines. Decorate it however you like.


Below is the sample I have decorated. I only decorated the wide interwoven lines, but do not let that stop you decorating the background as well if you like. 

 I could not make up my mind in which direction I liked it so have shown you the worked sample in mirror reverse. You can decide which way you want it.


HAPPY DOODLING

Wednesday, 17 October 2012

Patterns Distructions for Dare 27

Pattern Distructions

These are the patterns I designed for Dare 27, which is posted on this site just bofore this post.
 
Half Flower

This is an excellent design to put around or along and edge.


Border Patterns

These patterns make your border or outline more interesting than a straight line.


 Leaf Sprig

This little pattern can be used in any size space or to add decoration to the outside of a shape. If is also useful if you want something to follow the contour of an edge.


Centre Decoration

This pattern can be used with whatever number of points you wish, making it very versitile for any shape, round, octagonal, hexagonal etc.


Variations to this design


HAPPY DOODLING

Monday, 15 October 2012

Dare 27

Dare 27

This is my design for Dare 27 issued by Erin's blog, 'The Bright Owl.'

As I scanned this image, the colours are not as true, but you get the idea. I really enjoyed doing this one. It was lots of fun. Thanks Erin.

Two of the patterns I used here are Fescu and Sanibelle. I used a variation of Fescu in the other yellow section. The pattern in the outer pink section I have been using for a long time and do not know where I got it from . If anyone knows the name of this pattern please let me know. I will post the distructions for the pattern I used here that are mine in a separate post.

If you have not entered Erin's Dare before. Why not give it a go. The challenge always stretches me to try things I have not tried before and when I finish I am always glad I had a go.

HAPPY DOODLING

Friday, 12 October 2012

Celtic Challenge 9

Celtic Challenge 9


I have decided to move away from the circular shape for this challenge. I hope you like the outlined pattern. 

My Challenge to you this week is to use at least 3 patterns you have never used before to decorate this design.

If you don't know any new patterns then click onto the Tangle Patterns Button on the right of this Blog and go the that website. There are hundreds of teriffic patterns to choose from.

3 out of the 4 patterns I used on my example below I have never used before. I am a bad one for using the same pattern over and over again so this was as much if not more of a challenge to me than probably many of you.

I decided the leave the centre empty. I may put some verse there at a later date, or use it as the front of a square card and cut out a small square in the centre so that what it on the inside shows through.

Sorry Faith, not having a Zentangles education, I have not completely got into the habit of keeping the names of all the patterns I use. You are right it would be very helpful for those who are learning and I will try to do this in future. 

The patterns I used in this design were Socc, Ragz, step 1 & 2 of 'C' - scape, and a part of LinQ with a variation to it.
 
HAPPY DOODLING


Thursday, 11 October 2012

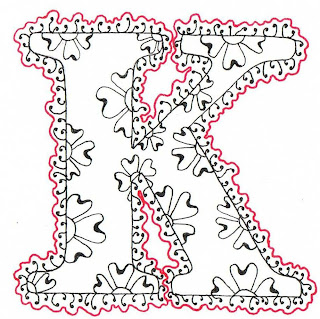
Lacy Flower Alphabet

Lacy Flower Alphabet 
Distructions

In pencil draw or trace your letter.
In pen position your flower centres on your letter. Spacing them so that there is room to draw the petals.
Now draw in your flower petals.

Draw in the outline of your letter and add you little stamens around the outside of your letter. Make sure you vary the height and the direction so that you create interest.
Now you can add the wavy line around the little heads of the stamens to give that lacy look to your outline.
Your letter is now ready to add doodle patterns of your choice and colour if you wish.
As you can see by the letter I have decorated at the top of this post I chose only to add colour.

There is a large variety of options you could have with this design. Add leaves to the flowers, change the shape of the petals or put a different decorative lace around the outside edge. Your options are endless as usual.
 
If you would like to use whole alphabets in a project I have  complete outlines in my book "Creative Doodling with Judy A 2 Z". There are a number of Alphabets with their corresponding numbers form 0-9 as well as borders, words and frames to match. There a  many new doodle patterns included also to use in decorating these Alphabet Outlines.


If you would like to purchase my book click: HERE
 
HAPPY DOODLING