
Celtic Challenge 21
Hi all, I hope you have had a good couple of weeks.
I have decided to introduce some new ways to challenge you this week.
Celtic Challenge 21 A.
Copy the outline below onto some interesting paper or card. Not just plain white or cream, but something with a pattern. Hand made papers are very interesting or if you have some decorative papers, that you use for card making, scrapbooking or journalling. Then decorate your celtic pattern taking into consideration the patterned paper you have copied it onto.
I have left a large open centre this time, giving you plenty of room for an interesting decoration.
This outline would make a good frame I think.

Celtic Challenge 21 B
Use the distructions below to draw your celtic outline. Once you have finished, scan it onto your computer and print it onto a patterned piece of card or paper as I have instructed above. Then decorate your outline, taking into consideration the patterns on the paper.
Here are your distructions:
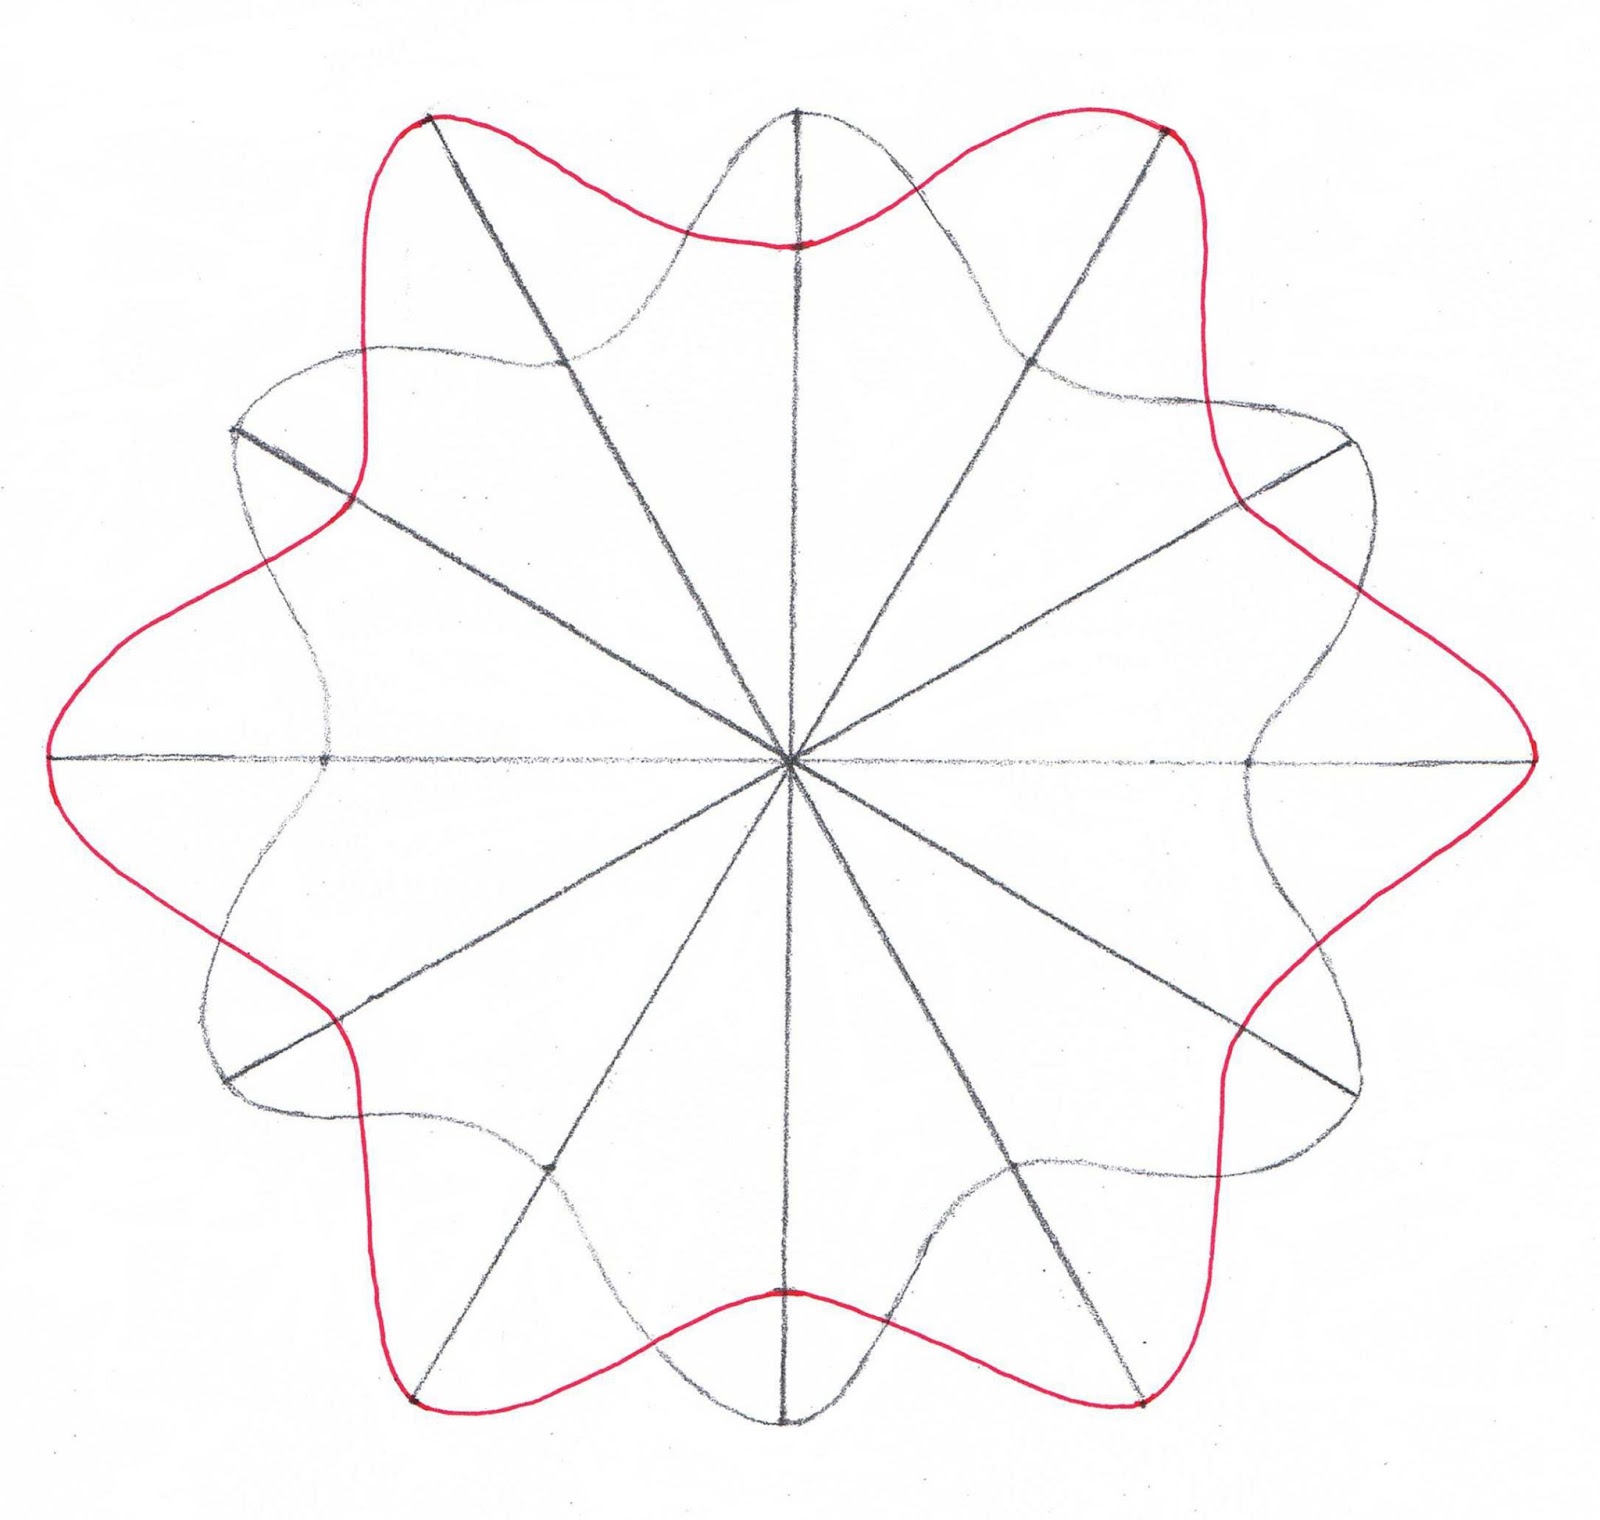
A. Draw the whole design in pencil first. Draw 6 intersecting lines, equally spaced apart. Alternating short and long lines.

B. Draw a line curving from the top of the short lines to part the way down the longer line beside and back to the top of the next short line. Continue all the way around to make a continuous curved line.

C. Draw a second line starting from the top of the longer line and curving part the way down the next shorter line and then back to the top of the next longer line. Continue all the way around to form a second continuous line.
D. Draw a second parallel line just inside the first continuous line.
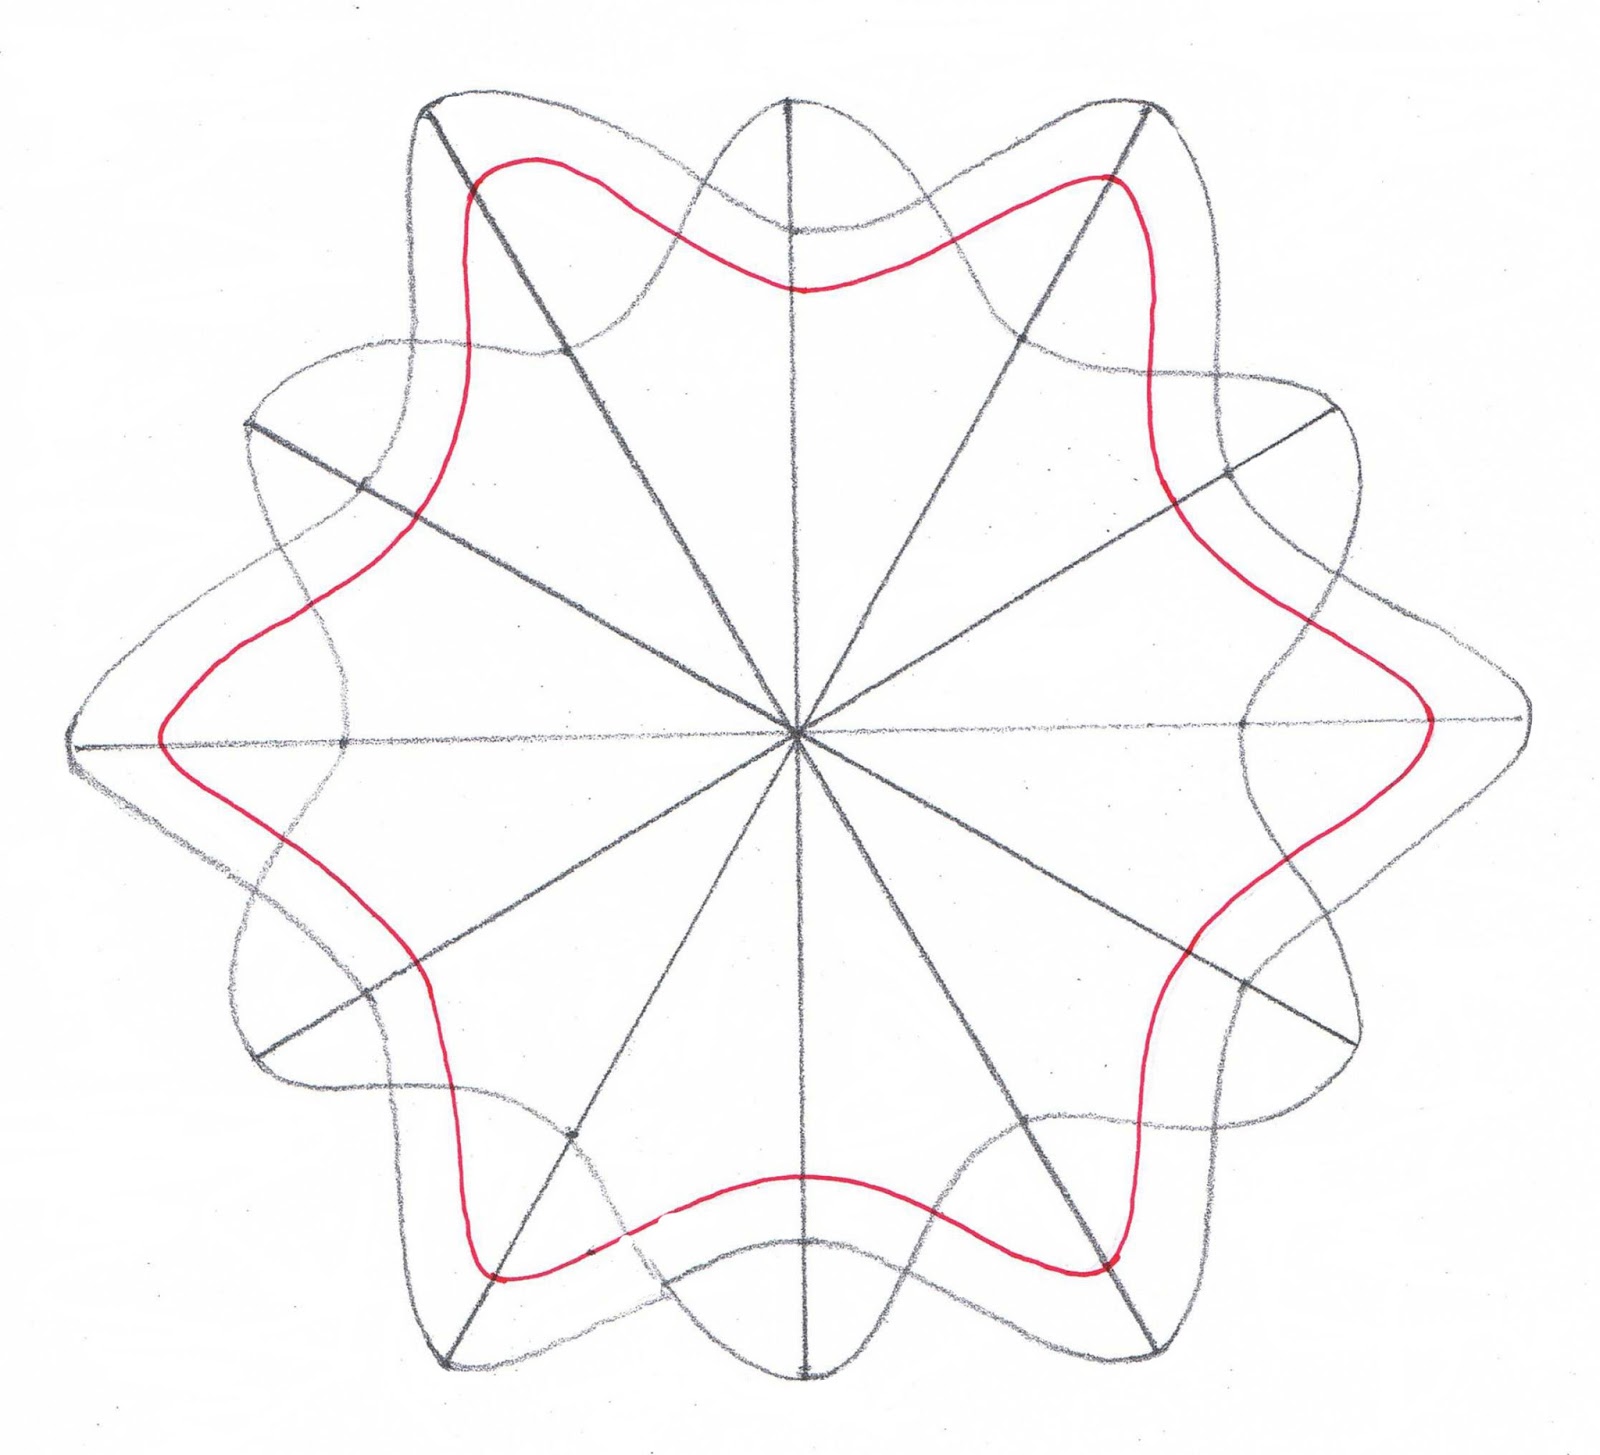
E. Draw a second parallel line just inside the second continuous line drawn.

F. Your celtic frame is complete. Rub out the guide lines and the sections of the continuous lines that would go under. Make sure the weave in a continuous over and under pattern, all the way around. Then to finish, go over the lines that are left in ink.
This is how I decorated this pattern.

The paper I used had a faint all over shell pattern. I am not completely happy with this one. I may do a second and post it later in the week.
The main patterns I have used are:
Hilly
Paprus - a new design
You can find the distructions for Hilly on my Border and Edges Pattern Page.
PAPRUS Distructions
interesting following the steps on the distruction :) i'm going to trace it with graphite, but i enjoy seeing the steps. it helps me understand the design better. thank you for being so faithful to post really cool stuff for us to work on!
ReplyDeleteGonna give the steps a whirl. I admit I will probably cheat and use a french curve. Thanks for these great deconstruct plns. very easy to understand.
ReplyDeleteThanks Judy. It isn't hard to see that I drew my own (wobbly) version. Second time round I'm going to add a few curves. It's the first time ever that I haven't used any black.
ReplyDeletehi Judy, I used your template to make a birthday card. Thank you for sharing your distructions.
ReplyDeleteJudy, I loved to use your own patterns, Little Weeds and Heartbeat. Thank you!
ReplyDelete